If you want to know the best way to remove paint from a wood deck, then this guide will show you all the best options and how to do them step by step…
Let’s get into it…
Being that I restore decks for a living, I’ve had to remove deck paint on a regular basis…
So, I’m going to show you the 2 ways that I use to remove deck paint…
These are the 2 methods that I personally use week in, week out…
So without further adieu…
These are the 2 best ways to remove paint from a wood deck…
- Removing deck paint with a sander…
- Removing paint from a deck with a pressure washer and chemical stripper…
The truth is, both of these deck paint removal methods work really well but they’re also uncomfortable to do…
They can hurt when you do them for a long period of time…
That’s why people pay me to do it for them…
But with that said, you can easily do it for yourself…
It’s not rocket science, it’s removing paint from a wood deck…
So I know with this guide in your hands, you’ll be more than capable of getting the job done…
Let’s start with…
Warning! Don’t Sand Your Deck Until You See This…
Crazy deck man reveals the deck sanding techniques used by the Pro’s!
Click Here…

Removing deck paint with a sander…
Now, removing deck paint with a sander is the only true method that will always work…
It’s just labour intensive so a lot of people don’t like to do it…
But it works…
So let’s look at the tools and materials you’re gonna need to remove that deck paint with a sander…
Tools needed…
- Belt sander
- Orbital sander
- Hammer
- Nail punch
- Ear muffs
- Dust mask
- Knee pads
Material needed…
- 40 grit sanding belts
- 40 grit sanding discs
Do you really need all the tools listed above?
Yes!
Yes you do!!
That is, if you want to remove that paint properly…
Stick with me, I’m about to show you the process of removing deck paint with a sander…
The Complete Step by Step Deck Staining Course…
Want me to show you exactly how to stain your deck step by step?
Click here to find out more…

Removing deck paint with a sander in 3 easy steps…
- Knock down the deck nails…
- Remove the deck paint with a belt sander…
- Remove deck paint from the edges with an orbital sander…
That’s it…
Now you know all the secrets…
Go forth and remove that deck paint…
No, I wouldn’t leave you hanging like that…
Let’s go into each step in more detail…
1. Knock down the deck nails…
This is one of the most critical steps when it comes to removing deck paint with a sander…
If you have any nails or screws sitting above the surface of your deck boards, the moment you run the sanding belts over them, they’ll get torn to shreds…
So the first step is to go along and hammer and punch any nails that sit above the paint surface…
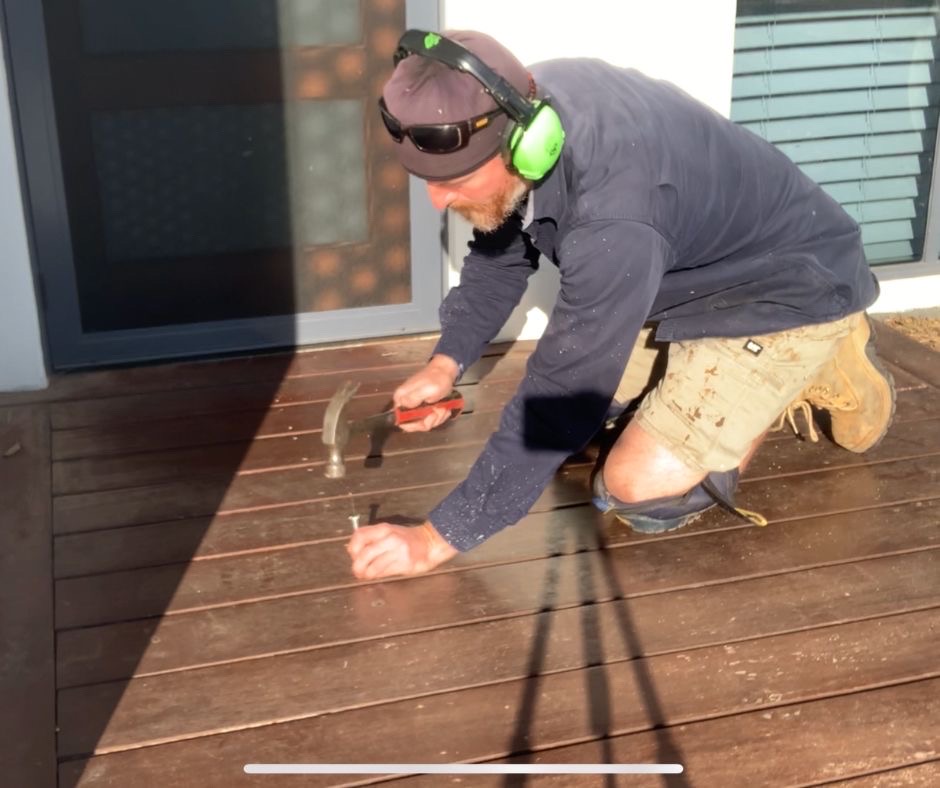
It’s a pain to do but shredding your sandpaper is a lot worse, trust me…
Now, if you have deck screws, get yourself one of these impact drivers…
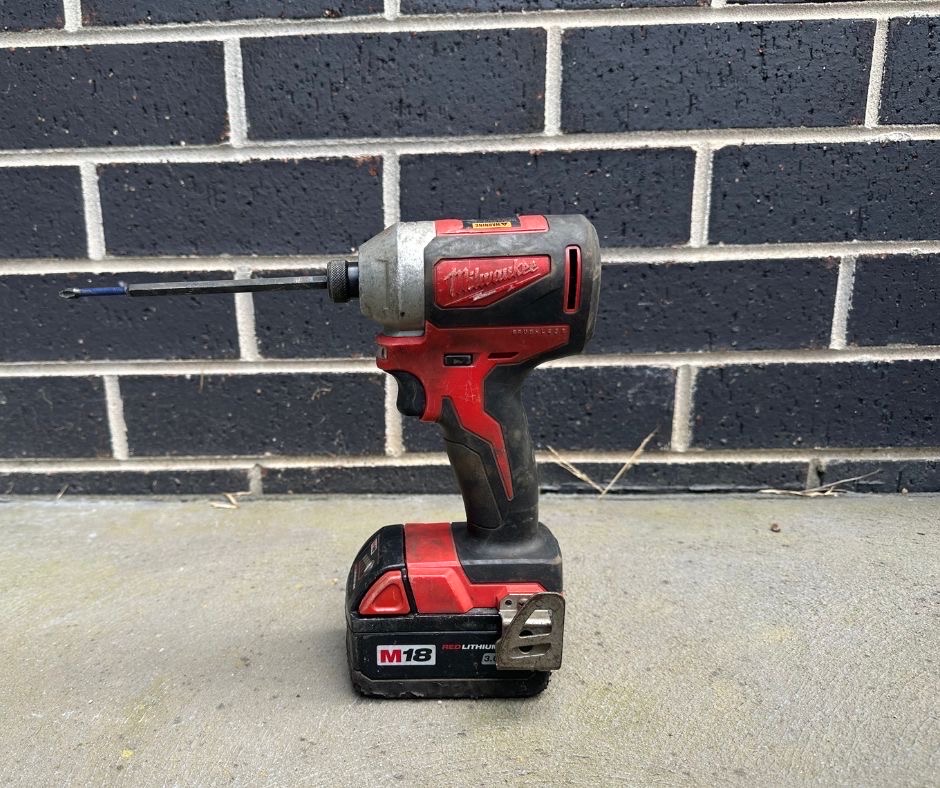
And drive those deck screws below the surface of the deck…
If you’re driving the screws into a hardwood deck, sometimes you can’t drive the screws any deeper than they already are…
In this case, reverse the screws out half way and then drive them back down…
It’s like giving your screws a “run up”…
They pick up speed and drive deeper than they were before…
Make sure you do every single screw and nail…
Ok, now we’re ready to move on…
2. Remove the deck paint with a belt sander…
When it comes to removing deck paint, you want to sand it off with a 40 grit sandpaper…
So grab yourself some 40 grit sandpaper belts and your belt sander and get to work…
You want to make sure that you only sand in the direction that your boards are running…
Like this…
Never sand across the decking boards…
Got it?
Ok good…
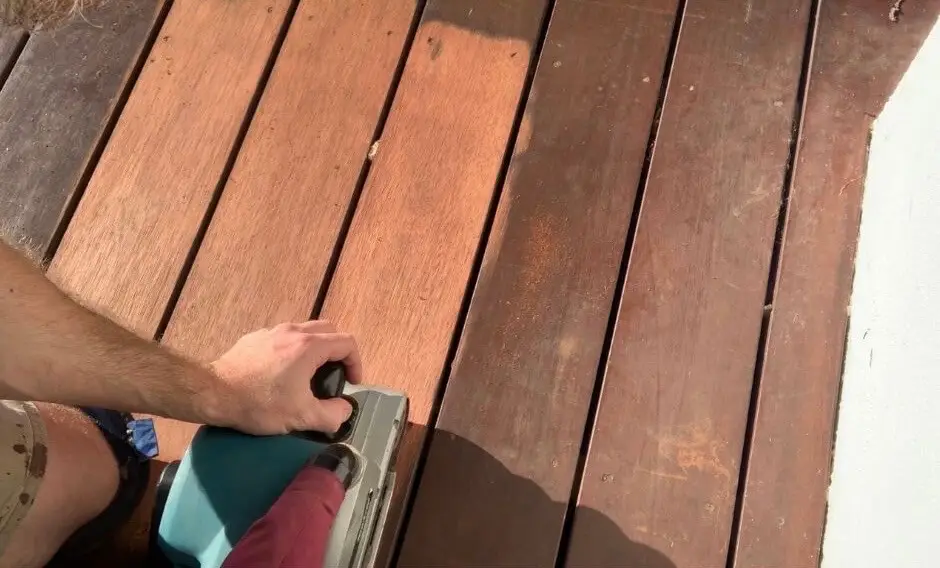
Now kneel down next to the sander and make sure you’ve got your hand on the front handle, then turn the sander on…
It’ll try to run away from you but just hold it in place by holding that front handle…
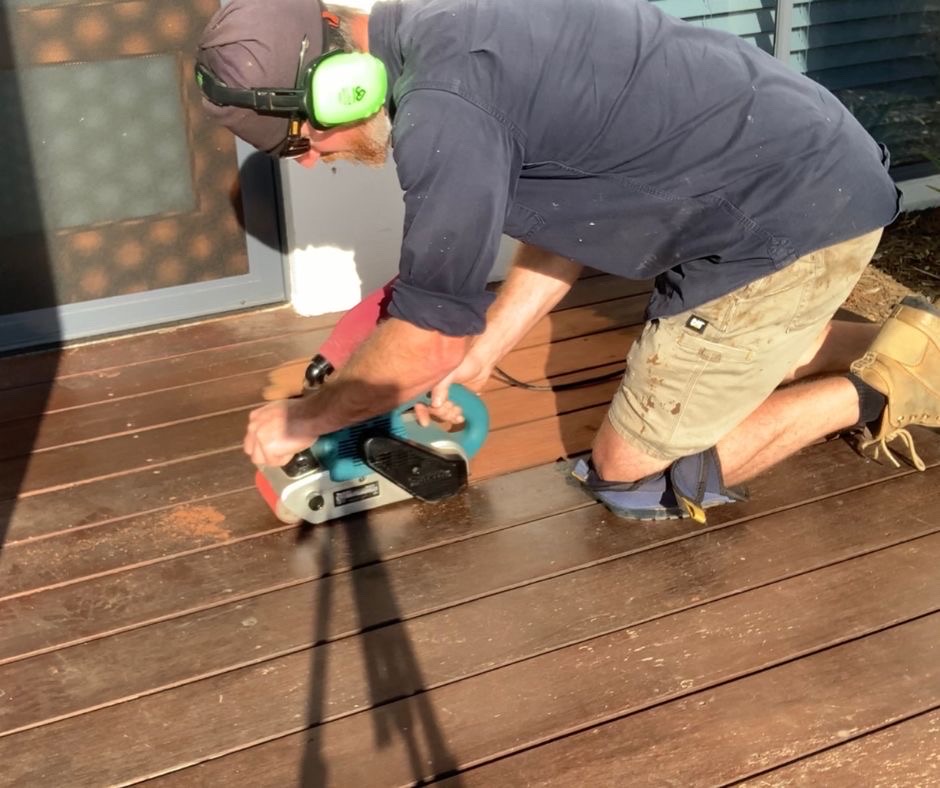
The key is to keep the sander flat to the surface and let it do most of the work…
You can apply a little bit of pressure to the sander to help it remove the deck paint a little quicker…
If your deck paint is in good condition it will come off with no problem…
But if the deck paint is old and starting to fade, removing it with a sander can be a lot more work…
You’ll notice you have to remove the top layer of paint and then there will be a layer underneath it…
You can see what I’m talking about in the picture below…
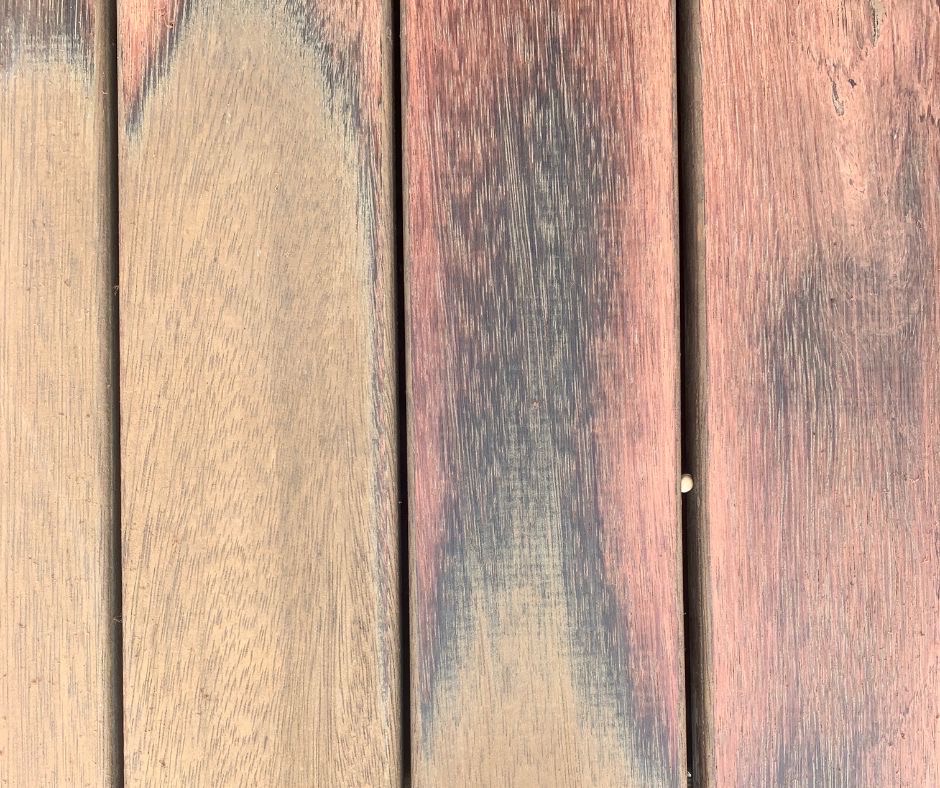
See the top yellow layer of paint?
Under that you see that black layer…
You have to remove that as well…
The other thing to notice about the picture above is that the edges of the board has been sanded back and are clean and pink…
But the middle of the board hasn’t been sanded properly and is still black…
This means that there is slight cupping in the board…
Now no matter how much you push that belt sander into the board, that stain isn’t going to budge…
In fact, if you hold the sander in the one spot for too long, you could possibly burn black marks into your timber or etch divots into the surface…
To make matters worse…
If you can’t remove all of the old stain, your new stain won’t be able to absorb into your timber and those spots will peel off within the first 6 months…
And don’t even think of using a massive floor sander to get those spots…
A floor sander will grind away too much from the surface and weaken your boards…
You need to stick with the belt sander and orbital sander combo but you need to use them in a very specific way…
The best way to do this is with my very special sanding methodology…
It’s two simple sanding techniques that I developed over the last ten years of sanding all types of deck with all types of coatings on them…
It’s the best way to sand your deck back completely without damaging and weakening your boards…
The first is called The RoundHouse Method…
And the second is called The High Skii Technique…
Using these two simple sanding techniques together will allow you to strip your deck back to bare timber and give it the best chance of absorbing your fresh coat of stain…
If you want to see how to sand your deck using these techniques, click this link here and I’ll explain everything…
Now, once you remove the deck paint up to the edges, you’ll notice that you can’t get right up to the edge of your deck…
That’s why we also use our orbital sander…
If you make these mistakes, your deck could peel…
Click here to find out how to avoid the Dreaded Peeling Deck!

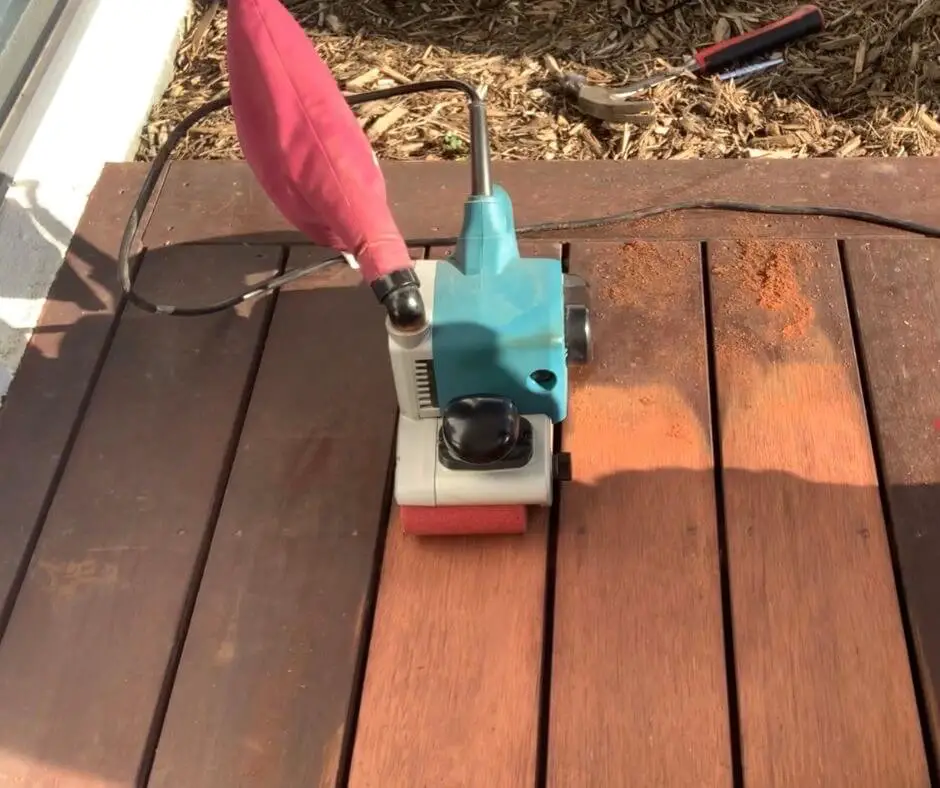
3. Remove deck paint from the edges with an orbital sander…
An orbital sander will allow you to remove that deck paint right up to the edge of your deck…
Again, you’ll need 40 grit discs for this one…
You want to keep your weight over the top of the orbital sander so it doesn’t tip and damage your deck…
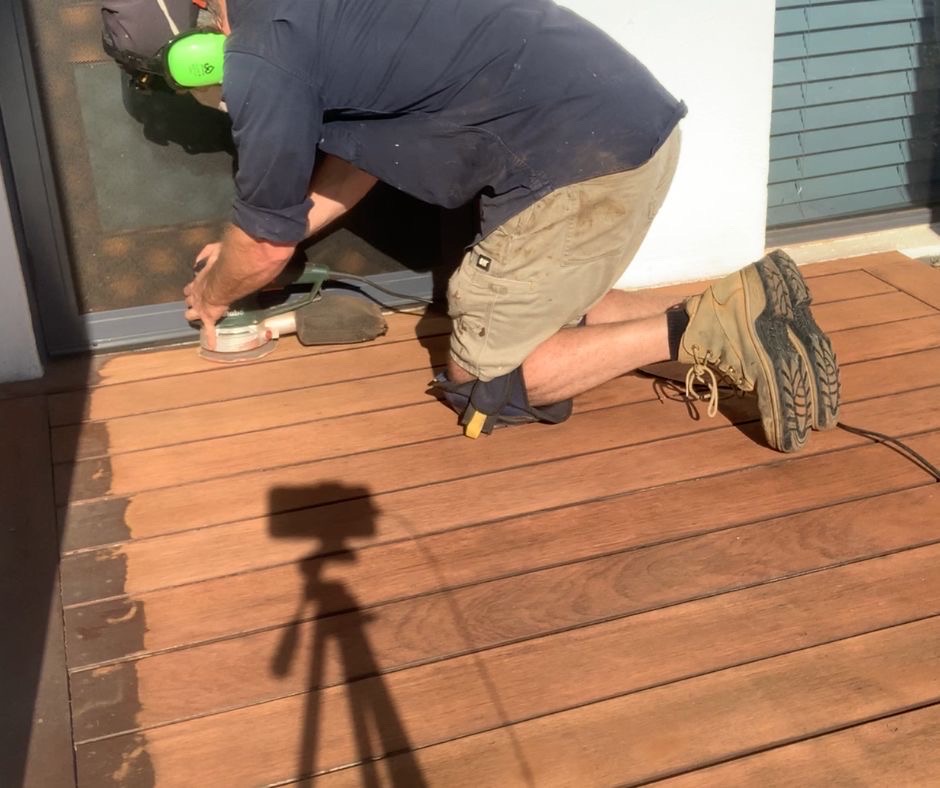
Simply work the sander around and watch the deck paint disappear…
Once you’re done, your deck will look like this…
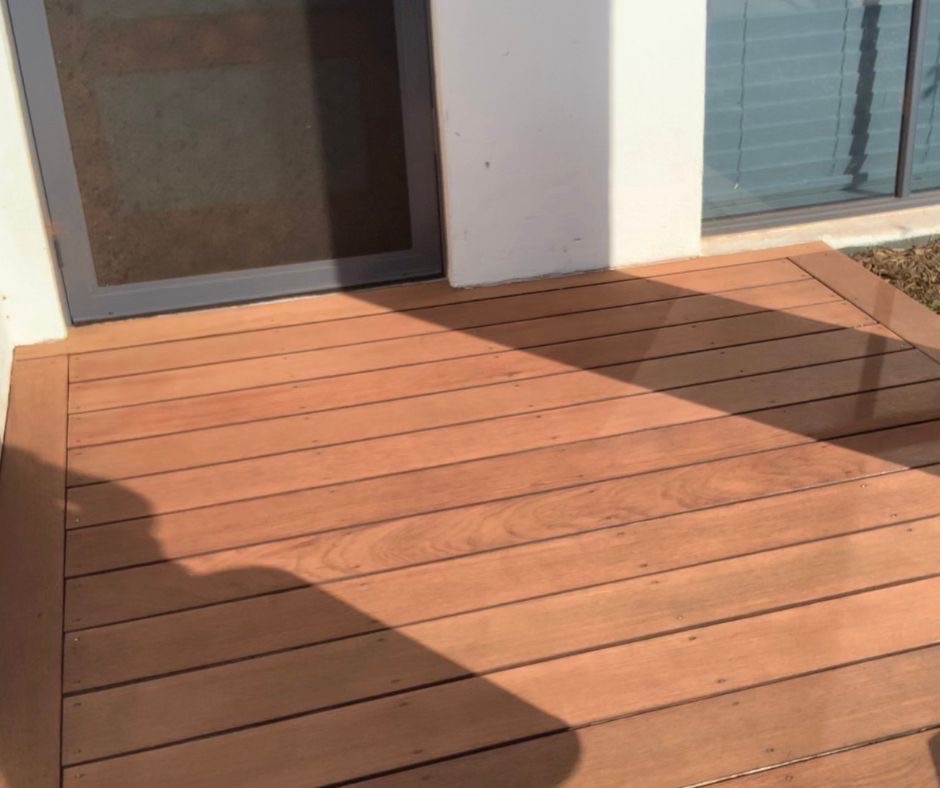
Congratulations!!
You successfully removed deck paint with a sander…
If you want a full breakdown of deck sanding including all the sanders and tools that I recommend, then you should check out my guide…
Yep, it’s the blue link above…
And the thing is, just because you successfully stripped your deck, it doesn’t mean that it’s ready to be painted or stained just yet…
That’s why I recommend clicking the blue link above and checking out my deck sanding guide…
Otherwise, let’s move onto…
Removing paint from a deck with a pressure washer and chemical stripper…
Removing paint from a deck with a pressure washer can be a lot easier on your back and knees than using a sander…
And if you have the right equipment and products, removing that paint from your deck will be a breeze…
So how about we start with listing the tools you’ll need…
Tools needed…
- Pressure washer…
- Ear muffs…
- Paint brush…
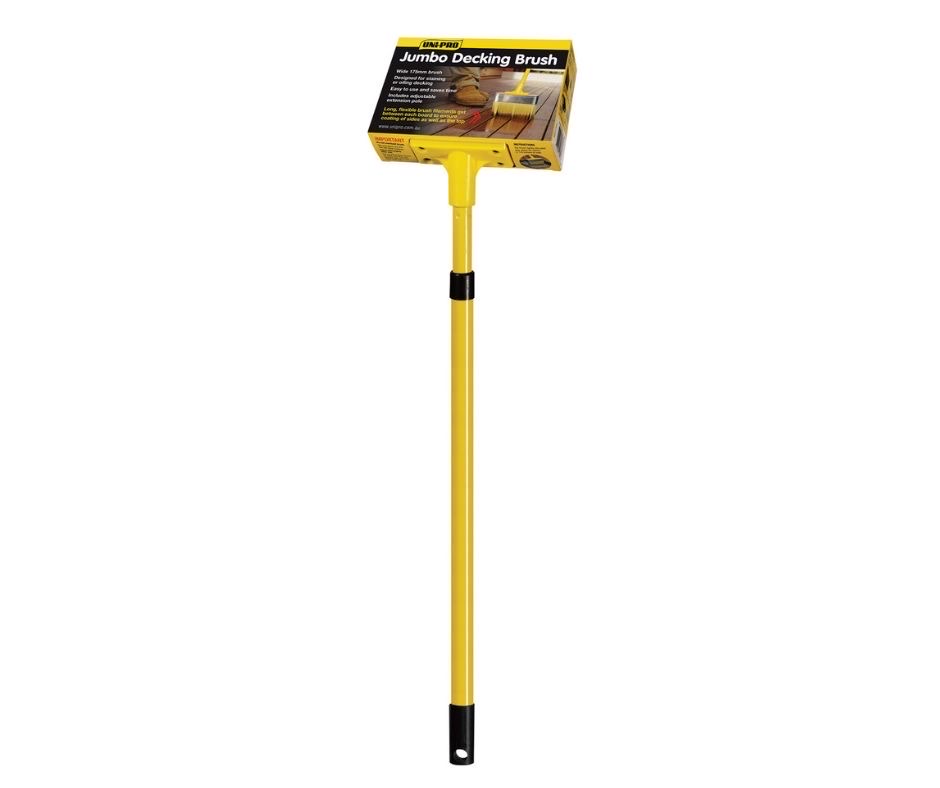
- Deck Applicator…
- Garden hose…
- Gumboots…
- Long bucket…
- Deck scrub brush…
Material needed…
- Deck stripper…
- Petrol in a can…
- Rags…
- Deck Brightener…
If you use an electric pressure washer then obviously you won’t need the petrol…
You’ll need an electric extension cable instead…
But I’ll let you work that out for yourself…
Let’s get into the nuts and bolt of removing paint from a deck with a pressure washer…
How to Remove Paint From a Deck With a Pressure Washer in 3 Easy Steps…
- Paint your deck with a deck paint stripper…
- Pressure wash to remove the paint…
- Scrub with a deck brightener…
There’s a little more to it but it all falls under these 3 steps…
Let’s get into step 1.
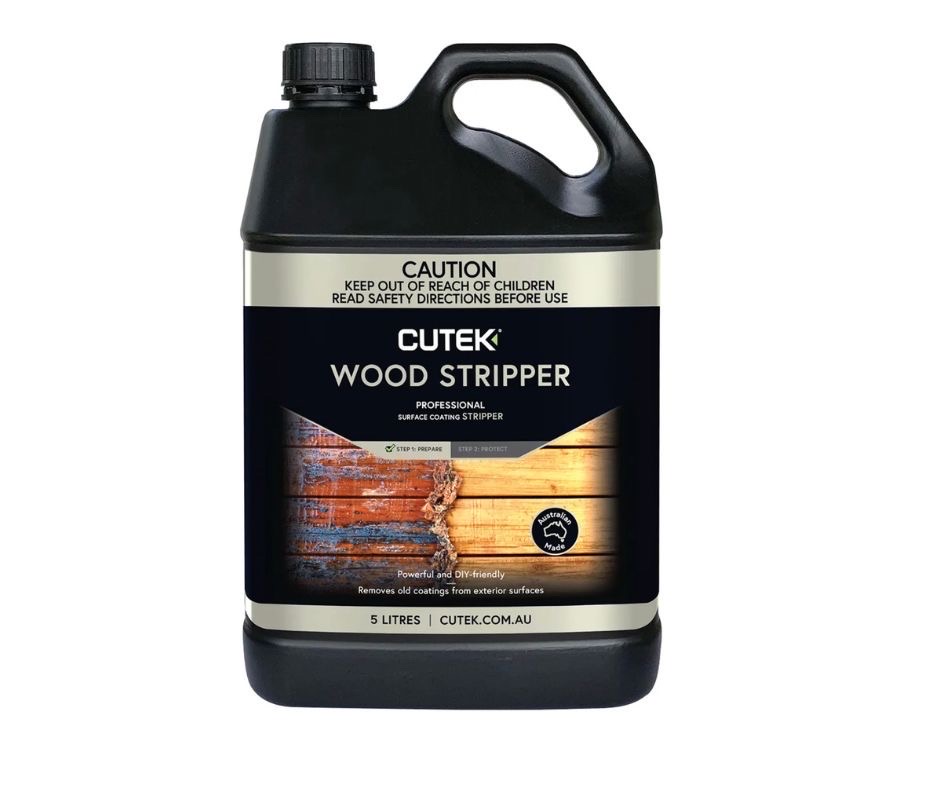
1. Paint your deck with a deck paint stripper…
If it’s deck paint you’re removing then grab yourself a deck paint stripper like this one…
You’ll want to follow the instructions on the back of the can but this is how it goes…
Pour the deck stripper into a long bucket like this…
Now, you’ll want to apply the stripper onto a dry deck surface, so make sure the deck is dry before you apply any stripper…
Start by using your paint brush to cut in around the edges of your deck…
Then grab your deck applicator…
And apply a liberal amount of paint stripper to the surface of your deck…
The key to this is to apply the stripper as quickly as possible and then spray it with a mist from your garden hose…
The reason is, you don’t want it to dry up on the surface of your deck so you need to keep it wet with the garden hose…
But only use a light mist so you don’t wash the stripper off the deck…
You’ll need to let it sit and work its magic for around 45 minutes…
Remember to keep it wet…
You’ll start to notice the surface of your deck will look a little different…

This means that the stripper is starting to remove the deck paint…
Now is the time to move onto the next step…
2. Use the Pressure Washer to remove the paint…
Now for the fun part…
If you’re using a cheap electric pressure washer, start with the normal wand and test a small section to see if the paint is coming off…
If it is, good!
Keep going…
If not, you can switch over to the Turbo Head and test that…
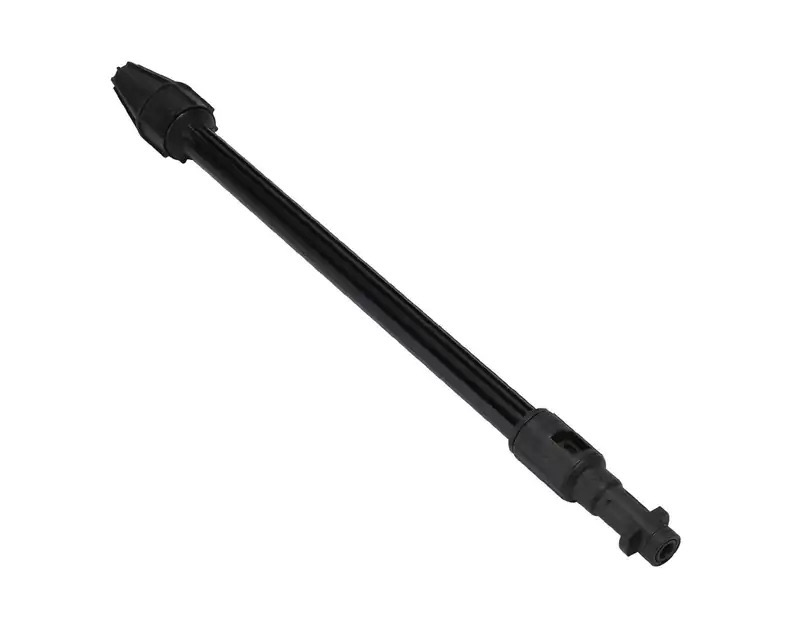
This will usually do the trick…
For those of you with a petrol pressure washer, the pressure tip you use will depend on the type of wood used to build your deck…
If your deck is softwood, then use a 40 degree tip…
If it’s a hard wood deck then use a 25 degree head…
Once you’ve got that sorted, it’s time to pressure wash your deck…
Simply point the tip at the deck paint and blast…
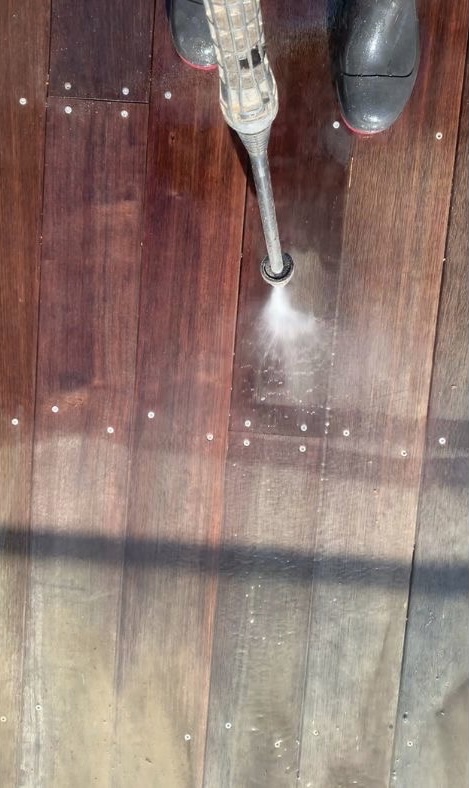
You’ll see the deck paint being removed right before your eyes…
You’ll love it!
For about 20 minutes…
Then your neck will start to ache…
The thing is, you can’t stop until you pressure wash all of that deck paint off..
And remember to keep the deck stripper wet…
So every 10 minutes, walk around to the areas that haven’t been pressure washed yet and give them a light spray…
Then get back to pressure washing that deck…
And keep going like this until you’ve completely removed the deck paint…
Now and only now are you ready for the final step…
3. Scrub with a deck brightener…
Now this next step is a very important one…
You see, after you douse your deck in a deck paint stripper, your boards will turn black…
And even if you’ve flooded the surface of your deck with gallons and gallons of water from your pressure washer, you’ll still have chemicals sitting on the surface of your deck…
It’s a really bad idea to repaint your deck with the chemicals still on the surface…
So that’s where the deck brightener comes into play…
The deck brightener will remove the “blackness” from your deck and neutralise the chemicals on the surface…
Here’s what you wanna do…
Get your deck brightener and your long bucket…

Then mix 1 part brightener to 1 part water…
The bottle will say to dilute it more but we want the mix nice and strong to get that blackness out of your deck boards…
Don’t be so worried!!
Ok, how about this?
Start with a weak mix and then when it doesn’t work, do the strong mix like I recommended in the first place…
Now grab your deck scrub brush and get a scrubbing…

Let it sit on the deck for like… 15 minutes…
But make sure you keep it wet…
Don’t let it dry into the surface of your deck…
You’ll notice all of the black chemical stains starting to disappear before your eyes…
Then after 15 minutes, wash it off with the pressure cleaner…
That’s it…
Once it’s all dry, you’ll be ready to give it a light sand and a couple of coats of a deck stain…
Staining your deck is the easy part…
So don’t skip out on the staining part of the job…
Sound good?
Awesome, cause you did it…
You successfully removed paint from a deck with a pressure washer…
Well done…
Now you Know The Best Way to Remove Paint From a Wood Deck…
Whether you used a sander to remove your deck paint or you went with the pressure washer, you’ll still need to complete a few more steps before your deck is finished…
You still need to smooth it off with an orbital sander…
Then you’ll need to choose the best deck paint…
And you’ll also have to master my world famous “Brush on, Brush off Technique” so you get that perfect piano finish on your deck…
The point is, there’s still so much more you need to do…
And truthfully, it’s these next step that will determine how long your new deck coating will last…
I’ve seen so many deck peel and the mistakes that cause decks to peel are made between stripping a deck and re-coating it…
Yup, I see it all the time…
I’m the guy who gets called in to fix the mess after the homeowner’s deck restoration attempt goes belly up and peels within the first 6 months…
It’s at this point that they believe that they need to bring in the “Experts” to do it properly…
Once you go through the whole deck restoration process, with all the sanding and cleaning and then taking care to get the perfect coating, and then it still peels within the first 6 months, most people are completely deflated…
Obviously there’s something that the experts know they you don’t…
I guess it times to pay the big bucks for the “Pros” to do it right…
But, you don’t need me or any other expert to do it for you…
As long as you’re willing to do the work, you can do this…
The reason deck restoration done by a pro can last for years compared to a restoration of a DIY’er that last merely 6 months is the Pro knows the mistakes to avoid…
The pro knows that if you do this, your deck will peel…
Or if the weather is like like, then you can’t stain…
Or if you sand like this, your deck can’t absorb the stain and the stain will peel…
You see, I’ve been at this deck restoration biz for over 10 years, and I’ve made all of the mistakes…
I’ve seen it all…
And I know that the difference between you and me isn’t 10 years of experience…
It’s that I know the 11 simple mistakes that cause your deck to peel and flake, so I simply don’t make those mistakes…
That’s it…
My 10 years experience has taught me these mistakes so I don’t make them anymore…
And do you know what?
You don’t need to bugger up and completely destroy your deck to find out what these 11 mistakes are…
I can simply tell you what they are so you can avoid them and have the knowledge of a 10 year deck restoration veteran in a matter of minutes…
If you want to get this right the first time, click here and I’ll tell you about the 11 mistakes to avoid…
I can go on all day about this, but I think I’ll stop right here…
That’s about all from me for today…
Peace,
Jason – The Deck Paint Remover Extraordinaire…
P.S. If you need any more advice on any step of the Deck Restoration process, head over to my Question & Answer Page and get your study on…
Don’t fall victim to a peeling deck!!
New guide reveals exactly why most DIY deck staining will peel within the first 6 months…
There’s 11 little known, deck staining mistakes that are so easy to fall victim to and even easier to avoid if you only know what they are…
Thats’ what the Deck Peeling Guide is all about…
If you mess up just one of these 11 techniques, your deck stain is going to peel…
Click the button below and avoid making these mistakes…
FAQ’S
Yes, you can definitely sand off deck paint. In fact, it’s one of the best ways to remove deck paint. You just need a belt sander, and orbital sander and so 40 grit sandpaper then you’’lol have no trouble…
The easiest way to remove deck paint would be by applying a chemical paint stripper and then using a pressure washer to remove the deck paint…
This depends on the condition of your paint. If it’s flaking and peeling then you do need to remove the old paint. However, if the deck paint is in good condition, then you can simply clean it and apply another coat of deck paint…
If you want to remove deck paint, you’ll need to use a 40 grit sand paper and then sand and smooth the deck with an 80 grit sandpaper…
0 Comments