
If you want to know how to repaint a deck with peeling paint, then this quick guide will show you exactly what you need to do, step by step…
Let’s get straight into it…
Introducing…
How to Repaint a Deck With Peeling Paint…
The first thing I have to mention is that your peeling deck paint may not actually be paint…
Many people think they have paint on their deck but it is actually a solid colour deck stain…
Solid colour deck stain looks very similar to paint but it’s very different…
So if you have a solid stain and not a paint on your deck, then the only difference you need to consider is that when you go to re-paint or re-stain as the case may be, you won’t use a primer…
A primer is only if you are going to be using a paint…
This is because paint sits on the surface of your decking boards, whereas stain will absorb into the surface of your boards…
A primer will help the paint to stick but will stop a stain from penetrating the boards…
Make sense?
Oh, and also…
The stripping chemicals you use are also different for stains and paints…
The stripping chemicals for paint is a little more harsh and destructive…
The chemicals you use on stain won’t work to remove paint…
And in all honesty, I do not recommend applying paint to your deck…
Stain is much better than paint…
Paint peels way too easily and it’s a real bugger to strip off…
Ok, now that we have that out of the way, let’s get back to re-painting your deck…
First things first…
If you have a deck with peeling paint that is only in a few sections like this…

Then it is completely possible to repaint your deck without removing all of the existing paint…
You can simply remove the peeling sections and spot paint those sections…
The only thing to keep in mind is that doing this will protect your decking but it won’t look very good…
In fact, it can look quite ugly…
But if you decide you still want to paint over peeling sections, this is how you do it…
The Complete Step by Step Deck Staining Course…
Want me to show you exactly how to stain your deck step by step?
Click here to find out more…

Here’s a summary of how you would paint a deck with peeling paint only in certain sections…
- Use a scraper to remove any flaking paint from the peeling sections…
- Use 80 grit sandpaper to lightly smooth the peeling section until you can’t feel it when you rub your hand over it…
- Make sure that all the dust and flaky paint is no longer on the surface of your deck…
- Apply a paint primer and allow it to dry…
- Apply a coat of paint to the sanded sections…
- Wait for the paint to dry and apply a second coat to your whole deck so it blends in…
That’s pretty much all there is to it…
The key is to make sure you get that peeling section really smooth before you paint it…
If it is slightly raised and then you paint it, it’ll show up on the finished surface and look patchy…
So make sure you get it nice and smooth before you apply the paint…
Now, most of us aren’t that lucky to just have a few peeling spots here and there…
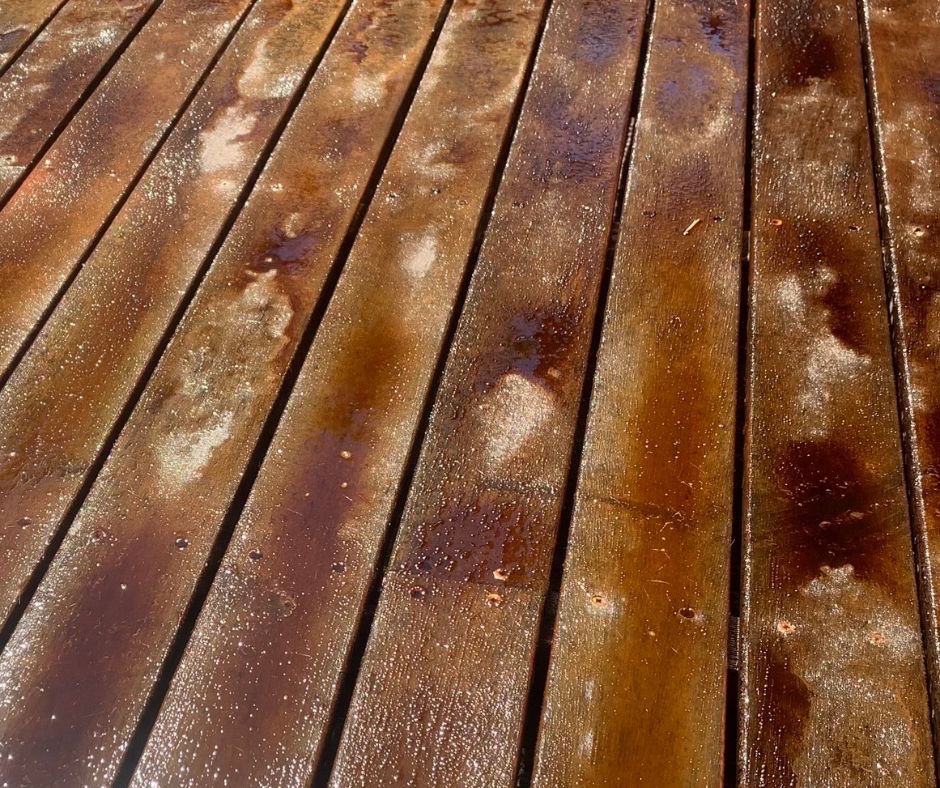
Most of the decks that I restored have flaking paint all over the decking like this…

And if your deck is peeling like this, then I have to be honest with you…
The best thing to do would be to strip the deck back to bare timber and start again…
The truth is, if you paint over a peeling deck like this one, your deck paint will just continue to peel…
At this point, the peeling has gone too far and any paint you put on top of this will look terrible…
But don’t worry, I’ll show you exactly how to do it…
Warning! Don’t Sand Your Deck Until You See This…
Crazy deck man reveals the deck sanding techniques used by the Pro’s!
Click Here…

This is how you should repaint a deck with peeling paint that can’t be spot repaired…
- Use a belt sander and 40 grit sandpaper to remove the old paint…
- Lightly sand with an orbital sander and 80 grit sandpaper to smooth your deck
- Make sure your deck is free from dust and dirt…
- Scrub and clean with oxalic acid…
- Let your deck completely dry before painting…
- Apply a primer before painting…
- Apply your deck paint with a brush and roller…
- Allow it to dry and apply a second coat…
- Wait 7 days for the paint to cure properly before putting furniture back…
This is a lot of steps but they’re all necessary if you want to prevent your deck from peeling in the future…
It’s also a little complex, so let me show you each step in more detail…
1. Use a belt sander and 40 grit sandpaper to remove the old paint…
This is the belt sander that I personally use to remove flaking deck paint…
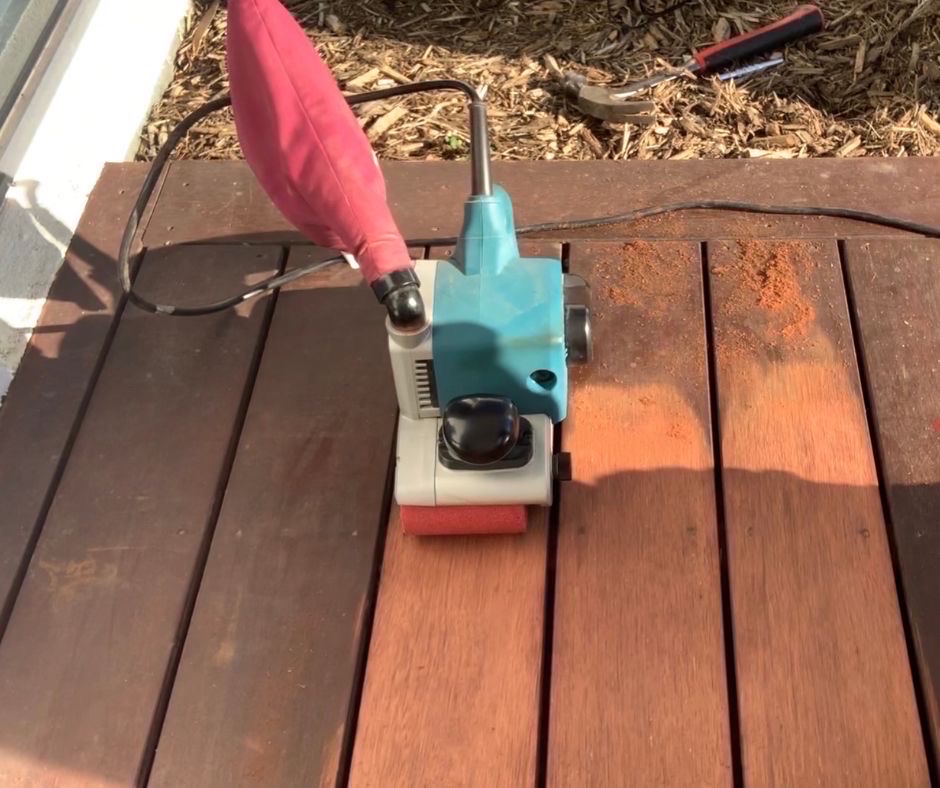
And these are the sanding belts that I recommend using…

When you’re sanding to strip a deck back to bare timber, you’ll want to use a 36 to 40 grit sandpaper for hardwood and a 60 grit sandpaper for a softer timber like treated pine…
Make sure you keep the sander flat and sand up and down the decking boards, not across them…
The moment you start to sand, you’ll most likely realise that around 30% of your deck just can’t be sanded…
It’ll be almost impossible to sand certain sections…
You’ll be tempted to press down harder but that won’t work…
You’ll work it over and over but your decking is all uneven and warped out of shape…
And in fact, pressing down harder and harder and working that one spot will actually cause damage to your decking..
It’ll look pretty level but the moment you start sanding, you’ll discover that it’s not…
Just to give you a little sample of how most decks are uneven and have low spots, check out this video…
See, how I keep working it over and over but that spot wouldn’t budge?
The only way to sand a deck properly and remove all of the old paint is to use 2 of my personal deck sanding techniques that I developed just for uneven boards, low spots, cupped boards and any type of warped-out-of-shape decking you can throw at it…
These 2 techniques work together to create deck sanding magic…
I call them “The RoundHouse Method” and “The High Skii Technique”…
Together they form my deck sanding methodology that I’ve perfected over the last 10 years…
If you wanna see how to use them for yourself, click here and I’ll tell you all about it…
Anyway, once you learn my very simple deck sanding techniques and your deck has been stripped back to bare timber you’ll want to go to the next step…
If you make these mistakes, your deck could peel…
Click here to find out how to avoid the Dreaded Peeling Deck!

2. Lightly sand with an orbital sander and 80 grit sandpaper to smooth your deck…
By this point, most of your peeling paint should have been removed from your deck…
The next step is to get yourself an orbital sander like this one and smooth the surface of your deck…
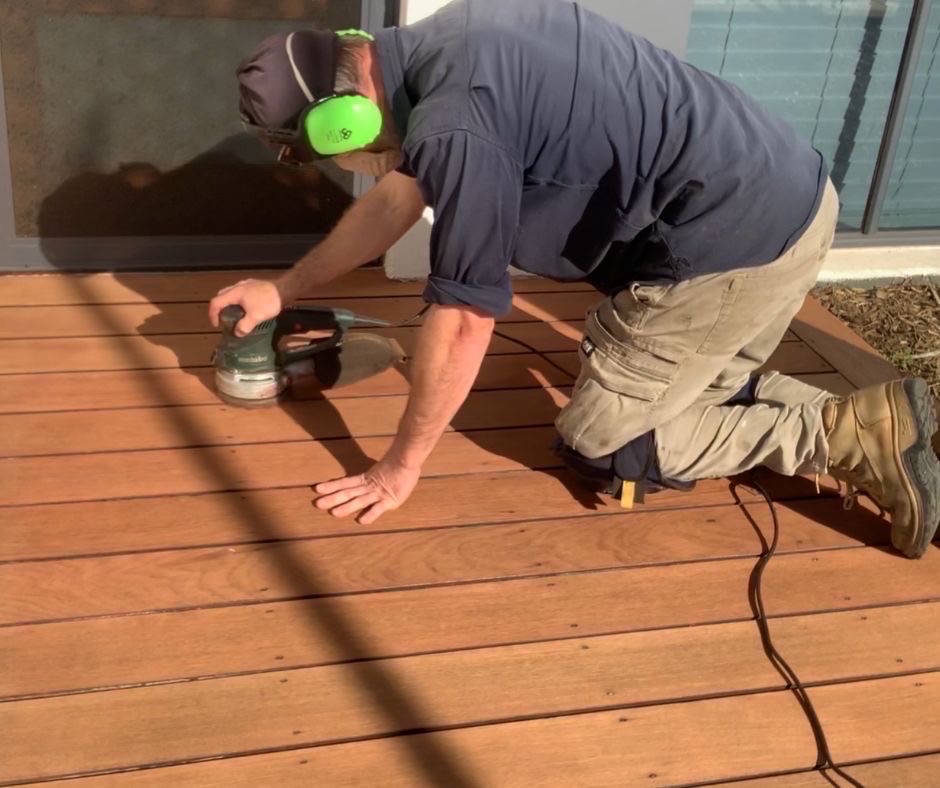
The one I’m using in this picture is the Metabo SXE3150…
This thing is a beast…
Highly recommended…
Anyway, the smoothing part of this job is done with an 80 grit sandpaper disc…
The whole idea with this step is to simply sand the surface until it’s smooth…
That’s it…
If you want a full breakdown on the basics of deck sanding, then you should check out my other guide, aptly titled “How to Sand Your Deck”…
Otherwise, move onto step 3…
3. Make sure your deck is free from dust and dirt…
At this point, you’ve probably got a boat load of dust sitting all over your deck and between the boards…
Use a vacuum cleaner like the Full Boar that I have…

And vacuum up as much of the dust as you can…
Then I like to grab my leaf blower and blow the rest of the dust off the deck…
Don’t forget to use your dust mask…
You want a dust mask that has a P2 rating for fine dust like this one below…
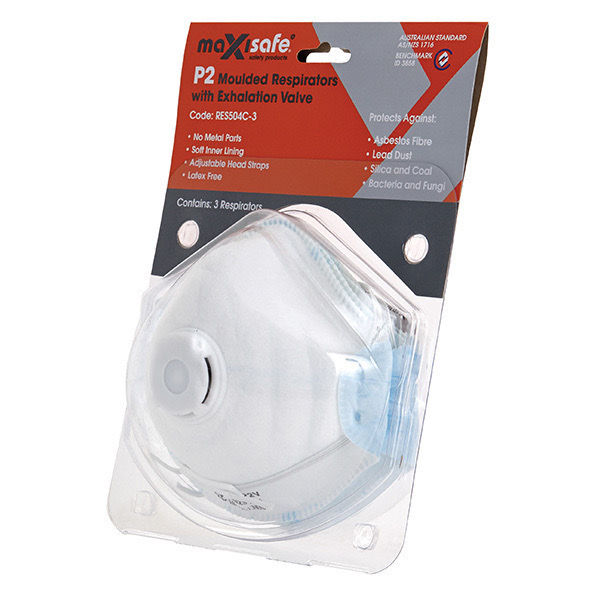
Your leftover Covid masks aren’t gonna cut it here, so don’t even try it…
Now at this stage, your deck should be ready to be repainted…
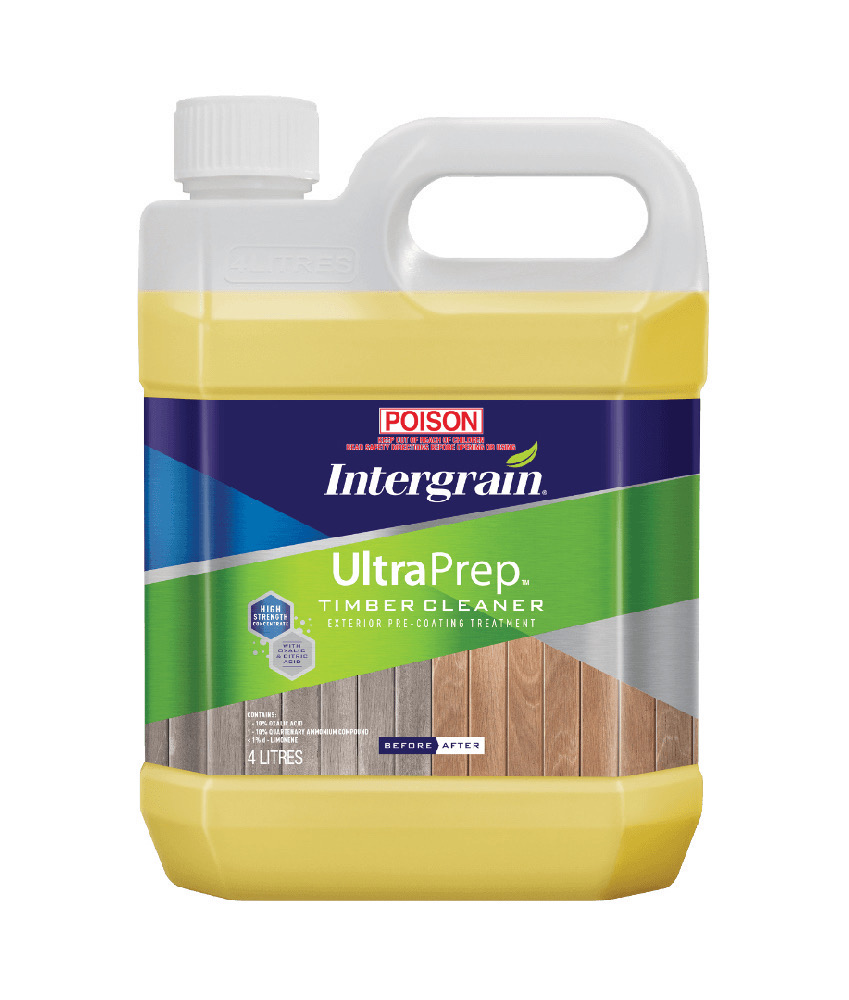
4. Scrub and clean with oxalic acid…
This step is important because the oxalic acid prepares your deck to be stained, oiled or painted…
We also call it a deck brightener…
The brightener will help to remove any contaminants, mould or even tannins that are lying in the wood fibres…
All of which can and will cause your deck paint to peel again…
So grab yourself a bottle of brightener…
This is the brightener that I use…
And then grab yourself a deck scrub brush…
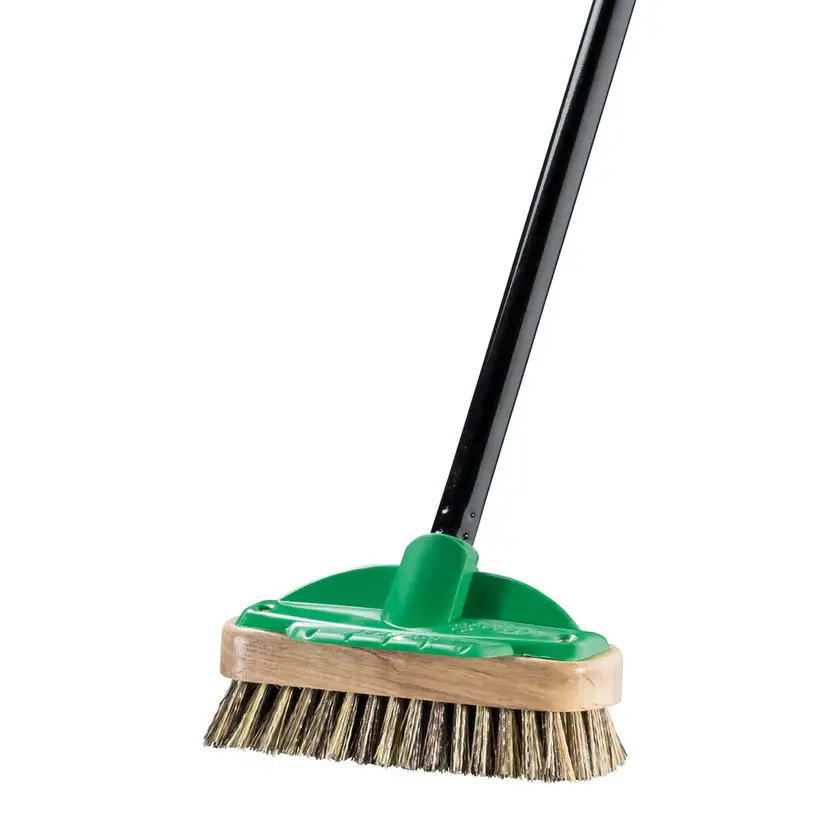
And follow the direction on the bottle…
Usually it will tell you to mix 4 parts water to 1 part acid…
That’s usually a pretty good mix…
Next you want to hose your deck down so it’s completely wet and then scrub the surface by dipping the brush into the acid mix and then scrubbing your deck…
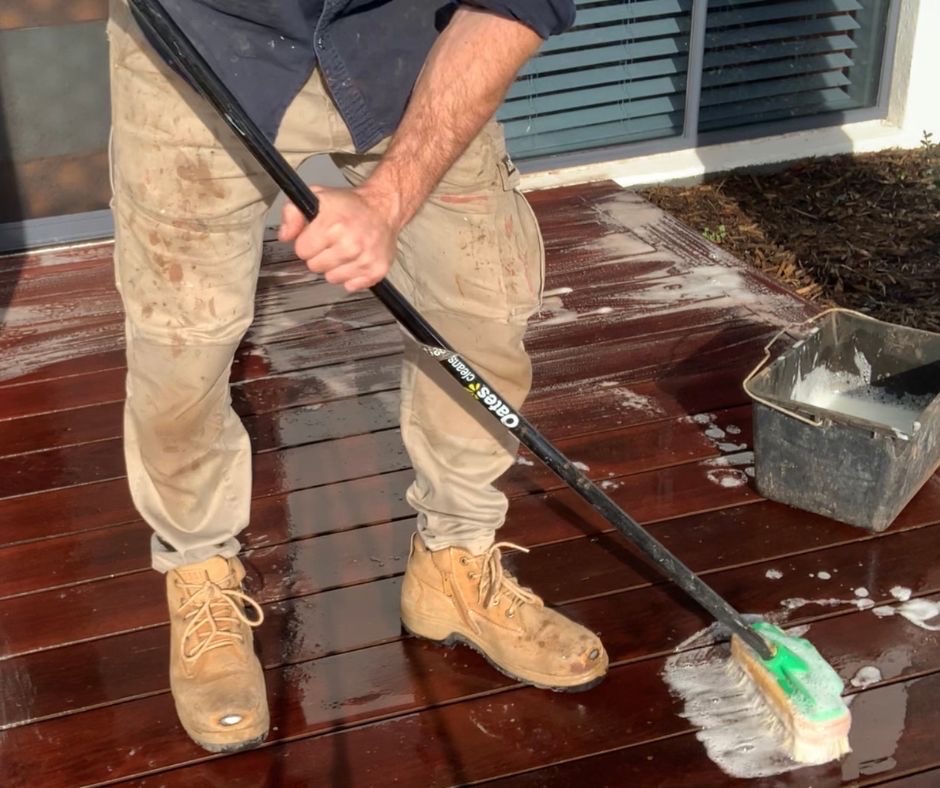
Make sure that you don’t let the brightener dry on the surface of your deck…
Keep it wet by hosing it lightly…
It’ll need to sit on your decking for 15 minutes then you can pressure wash it off…
5. Let your deck completely dry before painting…
This is a very critical part of your deck repainting job…
Some people ask me “Can you paint a wet deck?”…
The answer is no, you can’t paint a wet deck…
If there’s moisture in your deck and you apply paint over the top, the paint will bubble up and peel…
Any water in the deck timber will prevent the paint from getting a strong bond to the deck…
So make sure you give your deck at least 2 to 3 days to dry out properly before painting…
So be patient and let that deck dry out…
6. Apply a primer before painting…
Now this really depends on the deck paint that you choose, but in most cases, you’ll need to apply a coat of primer before you paint your deck…
So you really need to read the instructions on the can of paint you choose and follow what they recommend…
Then and only then can you paint your deck…
And this is how you should do it…
7. Apply your deck paint with a brush and roller…
We finally made it to the fun part…
Make sure your paint is still in date and give it a good stir…
Then grab yourself one of these deck painting buckets …
Or you can simply use a paint tray…
Either way, fill that sucker up with paint and get to painting…
Start by cutting in around the edges with a paint brush…
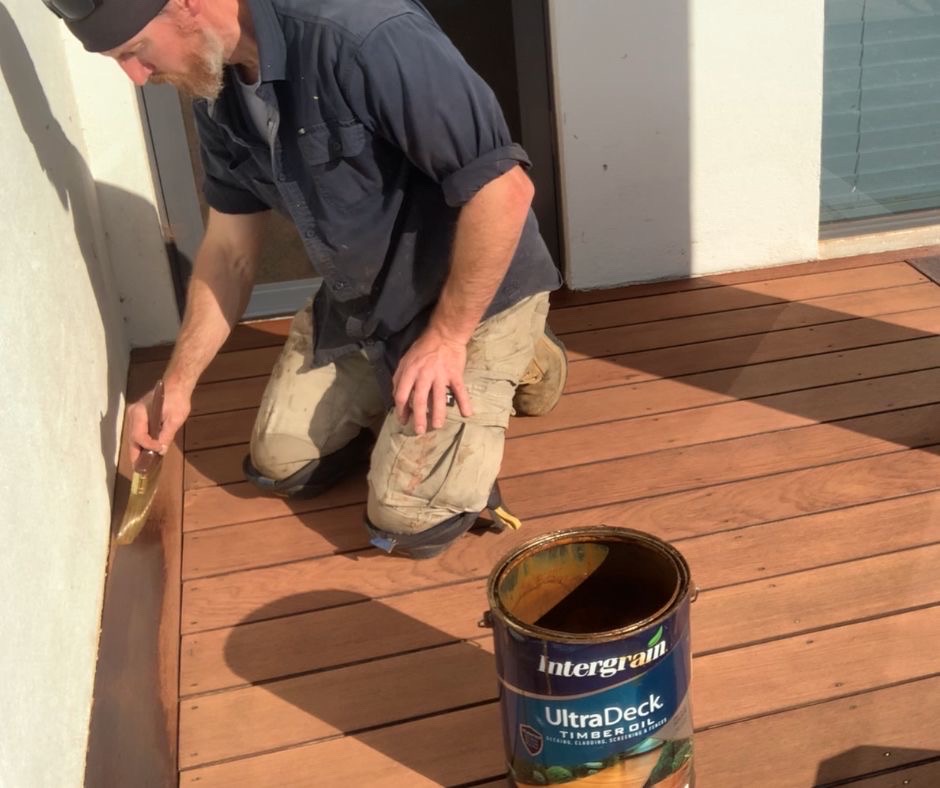
You’ll want a paint brush that is made for exterior timber or even for painting fences…

Once you’ve cut in, grab your paint roller and dip it into the tray but make sure you don’t apply too much paint…
We’re aiming for 3 to 3 thin coats of paint…
Not 1 coat so thick it’s a blobbing mess that’ll peel off within 3 months…
Make sense?
We want thin coats…
You can achieve this by making sure the roller isn’t dripping before you apply it to your deck…
Capish?
Ok, next up…
8. Allow it to dry and apply a second coat…
This is important…
Follow the “Time Between Coats” on the back of your paint can…
If it says wait 4 hours between coats, then wait 4 hours between coats…
It’s pretty simple…
So make sure your first coat of deck paint is completely dry and then apply a second coat…
Repeat this step if you’re planning on applying a third coat…
9. Wait 7 days for the paint to cure properly before putting furniture back…
Make sure you wait the full seven days before you throw a party and have 30 people stomping all over your deck…
Within the first seven days, the paint feels dry but it’s not fully cured yet which makes it easy to scratch and damage…
Trust me, wait it out or your deck paint will peel in 6 months time and you’ll need to go through this whole process again…
You don’t want that…
Anyway, what I’ve just gone through is golden…
It’s exactly what you need to do if your deck paint is peeling…
The thing is, if you have deck stain and not paint, then you’ll need to follow a different formula…
But don’t worry, I’ve got you…
If your deck stain is peeling and you need to fix it, the process is a little different…
The way you fix peeling deck stain is different from peeling paint…
The process is pretty similar but there are a few differences…
This is how to fix peeling deck stain…
1. Apply an environmentally friendly deck stripper to remove peeling deck stain…
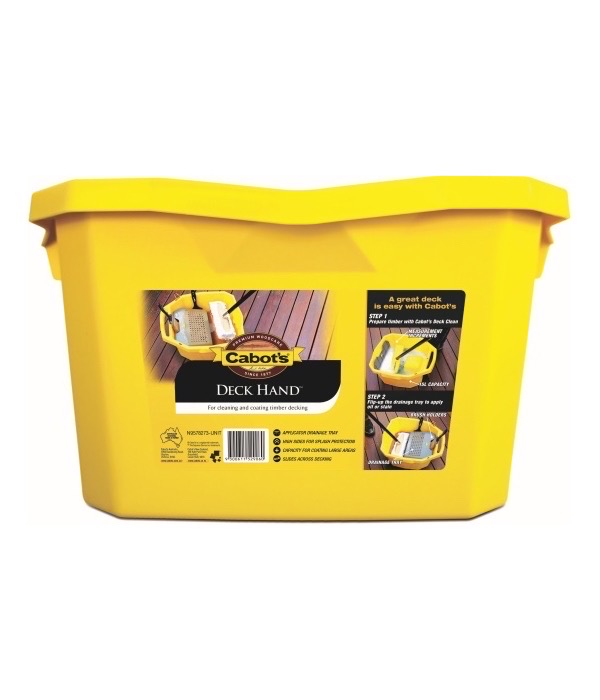
You need to get yourself a tub of deck stain stripper…

This isn’t a paint stripper…
This stuff is designed for deck stains and oils…
Generally it can leave marks on your paint but it won’t strip it off…
Peeling deck stain on the other hand, doesn’t stand a chance…
To do this properly, you’ll need to get yourself a bucket…
Then get the cheapest deck applicator you can find because once you use it with the deck stain stripper, it’ll be useless after that…
Now apply a generous amount of stain stripper to the surface of your deck and let it sit there for around 20 minutes…
The key is to keep the surface wet by spraying a light mist over the deck while it has the stripper on it…
After about 10 minutes, you’ll start to see the peeling deck stain soften…
Be careful because walking around on the deck with the stripper on it is really slippery..
It’s like walking on ice…
Test a section to see if the old deck stain is coming off…
Now you’re ready for step 2.
2. Remove the old stain with a pressure washer…
This is the fun part…
Use your pressure washer and remove all of the old peeling deck stain from the surface…
Making sure to spray down the sides of your home and any plants that may get covered in the stripper…
It is environmentally friendly but it can still kill your grass and plants…
As long as you water down the grass and plants before, during and after you pressure wash your deck, they’ll be fine…
Sometime after you pressure wash your deck, you can see this “Fuzzy” appearance…
If you do, you should check out my guide on how to get rid of the fuzzy deck…
Once the deck is completely stripped off you need to go to step 3…
3. Scrub and wash your deck with a deck brightener…
The deck brightener has 2 jobs…
Firstly, it neutralises any of the chemicals still sitting on the surface of your deck and secondly, it brings the natural colour back into the timber boards…
After you apply the deck stain stripper, most of your deck will look black and blotchy…
The brightener will remove the black spots and make the timber look bright…
I use the same brightener as listed before…
But I make this mix a little stronger…
I like to mix 1 part brightener to 2 parts water…
The chemical stains can be harder to lift, that’s why I go a little stronger with the mix…
Now just scrub the deck and watch the colour come back into your deck boards…
Once it’s dry, move onto step 4…
4. Use 80 grit sandpaper to remove any remaining deck stain and smooth the surface…
Once your deck has completely dried, grab yourself an orbital sander and 80 grit sand pads, then sand your deck until it’s nice and smooth…
Don’t forget to give it a vacuum and a blow off to make sure all of that dust is gone from the surface of your decking…
5. Use a DeckBrush Applicator to apply 3 coats of deck stain…
We don’t use a paint roller for this step…
Instead, you need to use a deck brush applicator…
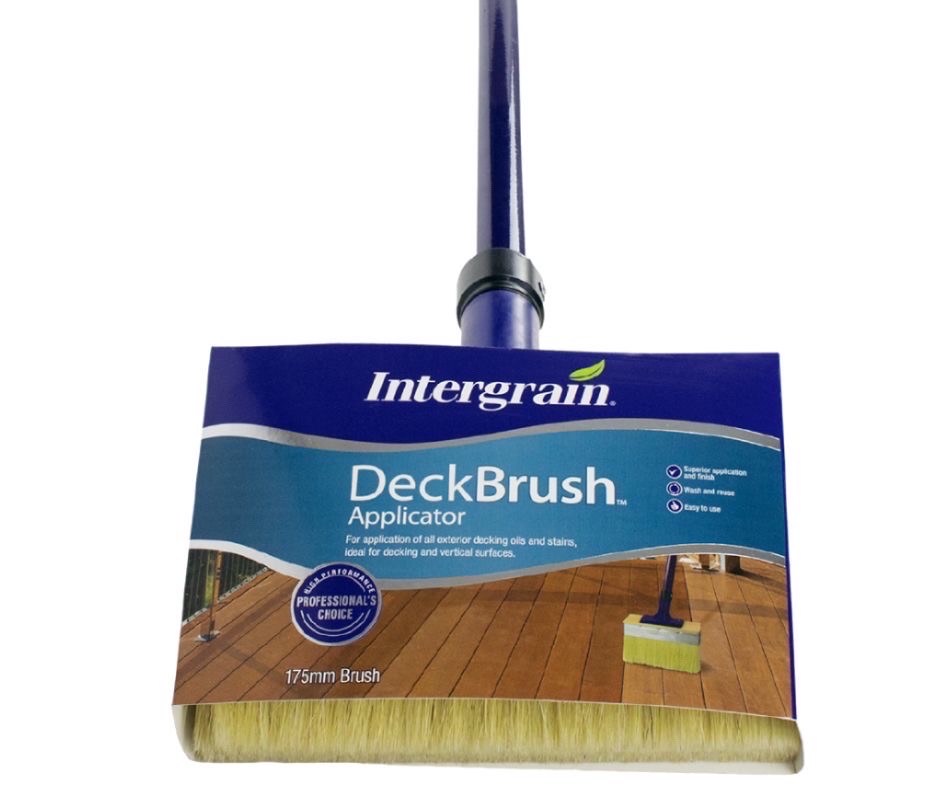
This is perfect for getting in between the deck boards so you stain down the sides as well…
The idea with the DeckBrush Applicator is to apply only a thin coat of stain…
You use the brush on, brush off technique so you only apply as much stain as your deck needs…
No more, no less…
I always apply 3 coats of stain to a deck. It’ll last much longer…
I show you how to do this in my guide “How to Stain a Deck”
Otherwise, continue onto step 6…
6. Wait seven days for it to cure properly…
This is something to really take seriously…
I’ve done so many deck restoration where the homeowner has failed to wait at least 7 days for the paint to cure properly…
They arrange for friends to come over 2 days after it’s been painted…
They put all of their deck furniture back and have a BBQ…
You know what happens next?
They sit around and slide the chairs in and out along the deck over and over again…
Because the paint hasn’t cured properly, it gets these tiny little scratches in the surface of the paint that you can’t really see..
No big deal right?
Nobody will really notice the scratches…
Well, not until the rain and sun start to attack the “weak”, scratched up section and then they start to peel…
It only took 3 months after I painted this deck for it to peel…
The homeowner wanted to know what I did wrong…
Well, I didn’t fence off your decking for 7 days is what I did wrong…
Don’t go through all of this work, repainting your peeling deck just to mess it up in the final steps and have it peel and flake again in 6 months…
Be patient and let the paint cure before you put that furniture back on…
Now, if you go through all this trouble and your deck paint still ends up prematurely, then you must have messed something up…
That’s because you haven’t fixed the problem that caused your decking to peel in the first place…
So before we do any type of deck painting, we need to look at why your deck paint started to peel and then we can fix the problem…
You with me?
Ok, let’s look at…
What Causes Deck Paint to Peel?
There’s many thing that can cause your deck to peel…
We’re going to explore each one so you work out which problem you have…
Moisture trapped in your deck…
One of the most common reasons that the paint peels off from your deck is because you’ve got moisture trapped in your decking boards…
You get moisture trapped in your deck board in two ways…
- When you painted your deck, your boards weren’t completely dry so the paint couldn’t adhere to your decking boards properly…
Then over time, your paint will bubble up, crack and peel…
- You only painted the top side of your deck so when it rains, the water sits under your deck. Then when the sun comes out, the water will evaporate which soaks in through the underside of your unpainted deck…
That water makes its way to the surface of your deck until it sits right behind your new paint job.
Guess what happens next?
That’s right, your deck paint will peel…
Now this is a pretty common cause of the dreaded peeling deck paint but it’s far from the only cause…
Another major cause is…
Tannins in your deck boards…
If you’ve painted a newly installed deck, this could be the cause of your peeling deck…
You may not know this but, new decking boards have this thing called tannins…
And when you first build a deck and install new boards, you’ll have these things called tannins that leach from your deck…
You’ll see them the most when it rains and your deck gets wet…
These tannins will continue to leach out of your boards for around the first 4 months, so if you paint a deck before the tannins have all come out, it will cause your deck to bubble and peel…
Make sense?
Ok, so the next way your deck keeps peeling is due to…
You could have used the wrong paint…
This happens if you use cheap paint or paint that isn’t made for exterior use…
And sometimes it’s simply because you used that old, out of date paint that you had sitting in the back of the shed…
If that’s the case, you poor deck never had a chance…
The sun and the rain will make that paint peel off your deck like nobody’s business…
Never, ever, ever, ever use interior paint or old paint!!
If you do, you’ll have to get that all off and start again…
Now, with that said, if you use the right deck paint it can still peel off if you do this…
You applied the deck paint too thick…
Holy Moly!!! There’s so many reasons why your deck paint is peeling, it’s making my head spin…
But the truth is, if you prep your deck exactly how it needs to be…
And you allow it to dry out properly and then on top of all that, you use the best quality deck paint…
But you apply the deck paint too thick…
It’ll peel right off!!
More is not better…
Thick deck paint can’t adhere to the deck boards properly so it will prematurely peel off…
So it’s better to apply 2 to 3 thin coats of deck paint rather than slopping on thick layers of deck paint…
Capish??
I hate to tell you this, but we’re not done yet…
If you paint your deck with an exterior paint rather than a paint made specifically for decks, then the reason for your peeling deck could be…
A primer wasn’t applied before painting your deck…
Deck paint and deck stains are designed to be absorbed into the deck boards…
Paint is designed to sit on the surface…
So if your paint sits on the surface, you need to make sure it will adhere or stick properly to those boards or it will peel right off..
You’ll need a high quality paint primer…
If not, you know this could be the cause of your peeling deck paint…
There’s actually 11 Mistakes that cause your deck to peel…
The causes I’ve listed above are just the tip of the iceberg…
And the thing is, if you do most things right but you only make one of these 11 mistakes, your deck will be peeling within the first 3 to 6 months…
I see it all the time…
It only takes one mistake to undo all of your hard work…
Here’s the thing…
These mistakes are so simple to avoid…
You just need to know what they are and then not make them…
It’s that easy…
And it’s the difference between a deck that last and looks fantastic for years and a deck that looks fantastic for 3 months and then is all peeling and flaking merely 6 months after being completed…
If you’re going to be stripping your deck and re-painting or re-staining then you really need top know what the mistakes are so you don’t make them…
It’s as simple as…
Wait for this to happen before you stain…
Make sure you do this to open the surface of your timber…
Make sure you don’t sand it like this…
Make sure you use the cleaning products in this order…
I can tell you what these mistakes are if you like?
Just click this link here and I’ll tell you everything you need to know…
That’s just about everything I know about how to paint a deck with peeling paint…
I just dumped all of my years of knowledge into your brain…
Now you should be able to tackle your peeling deck paint problems…
If you’re still confused as to what top do next, leave me a comment below and I’ll try my best to answer any questions you have…
Well, that’s about all I have time for today before I have to start charging, so I’ll leave it right here…
Best of luck with repainting your peeling deck…
Peace,
Jason
Need some Expert Advice?
If you’ve been searching the internet trying to find an answer to a specific deck problem and you’ve found it impossible to get a straight answer…
Why not just reach out and ask me directly for an answer?
I’ve got 10 years of deck knowledge crammed into my noggin. I can pretty much guarantee I’ve got an answer to your problem just rattling around in there…
Click the button below to find out more…
0 Comments